on all orders over $99
U.S. Orders Only (lower 48 states)
on all orders over $99
U.S. Orders Only (lower 48 states)

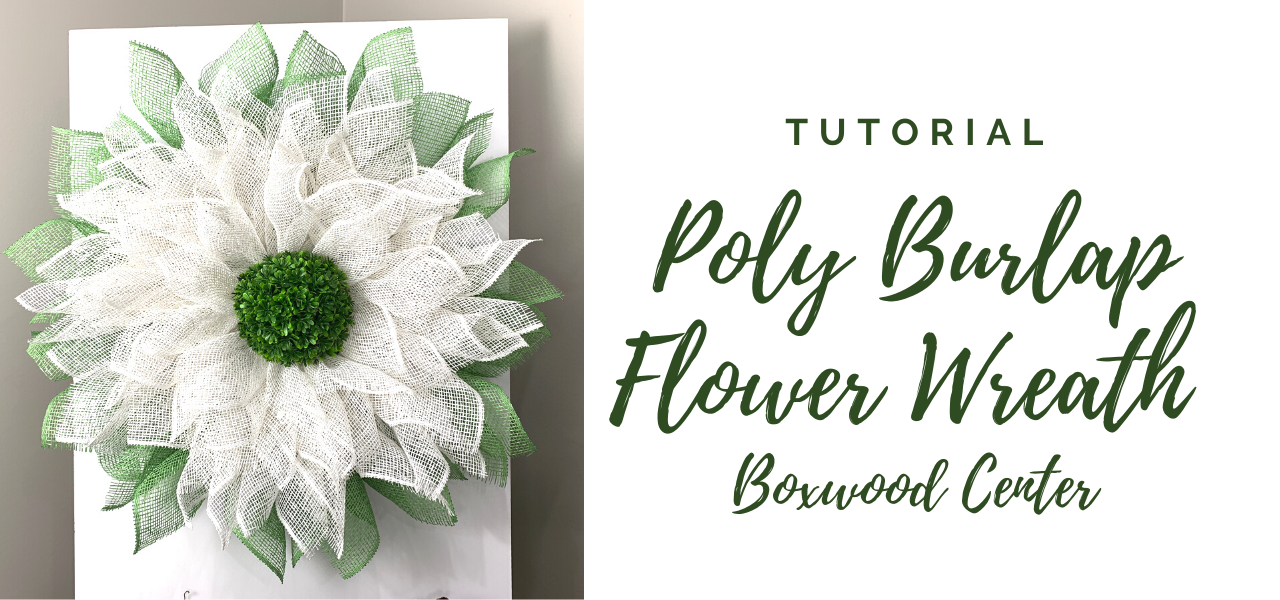
This tutorial will show you how to make a poly burlap flower wreath with boxwood center using poly burlap and a Unique in the Creek plastic flower form.
Watch the video!
RP810027 White Poly Burlap Mesh
RP810033 Lime Green Poly Burlap Mesh
13509GN Green Plastic Half Boxwood Ball
The round plastic flower form is 15" in diameter and has holes for attaching your mesh. It is also available in a 12" size, a cross and a tree form.
We previous made a flower wreath using metallic Deco poly mesh and you can see that blog post here:
Cut 16 pieces of the green poly burlap in 10" lengths. We used a wood-burning tool and cut through the mesh staying in the squares.
This does help with the unraveling, but does not stop it completely. You can also just use a rotary cutter or scissors, but anticipate more unraveling.
Lay the mesh down flat (edges will curl up) and pull opposing corners to the center of the square. Scrunch up the petal in the center and turn it over so the edges are curved downward.
Make two petals, hold them together and attach them to the outer hole on the flower form using a zip tie. Snip off the end of the zip tie with wire cutters, not your scissors. Squeeze the petals together like forming a "v" and push toward the outside.
If you need help pulling the zip tie tight, use some needle nose pliers.
Place the petals "leaves" around the outer ring of holes on the form. You will have some of the green poly burlap left over.
Cut 36 pieces of the white poly burlap in 10" lengths. It will take the whole roll. Don't worry if one of your pieces comes out a little short. If this happens, just use that petal further out in the wreath and not right in the center.
The holes are "double" starting with row two on the board. Go ahead and place your zip ties on the board but don't pull them tight. Just pull them enough to keep from falling out.
Make the white petal in the same manner, flip it over, fold together and squeeze the petals together like forming a "v." Slide the folded end of the petal under the zip tie about 1/4" to 1/2" and secure the zip tie. Snip off the end.
Continue working around the wreath in the same manner. Move on to 3, 4, and 5 with the same petals.
Secure the half boxwood ball with floral wire. Place four pieces of wire on the back side of the ball and position the boxwood in the center. Secure to a hole, or petal, whatever is handy to hold the boxwood ball in place.
Check the back of the form and make sure nothing is sticking out that would scratch your door.
If you don't like the looks of the back, you could always cover it with felt, fabric or pretty paper.
There are two holes at the top of the form on row 1 that you can use to attach a hanger.
Make a hanger out of floral wire, zip ties, chenille stems or paper covered wire.
Clip any strings. Clip rather than pull.
Thanks for visiting our blog! We hope you enjoyed this tutorial on making a poly burlap wreath. If you have any questions or comments, just contact us: Trendy Tree Blog
You can also make this flower wreath using other types of mesh and you can do it with a plain metal form and chenille stems versus the plastic form. We have a tutorial coming up to show you how to do this.
Here are more flower tutorials you might enjoy.
Disclosure: We engage in affiliate marketing whereby I may receive funds through clicks to affiliate programs through this website or receive funds through the sale of goods or services on or through this website. I may also accept advertising and sponsorships from commercial businesses or receive other forms of advertising compensation. This disclosure is intended to comply with the US Federal Trade Commission Rules on marketing and advertising, as well as any other legal requirements which may apply.
{"one"=>"Select 2 or 3 items to compare", "other"=>"{{ count }} of 3 items selected"}