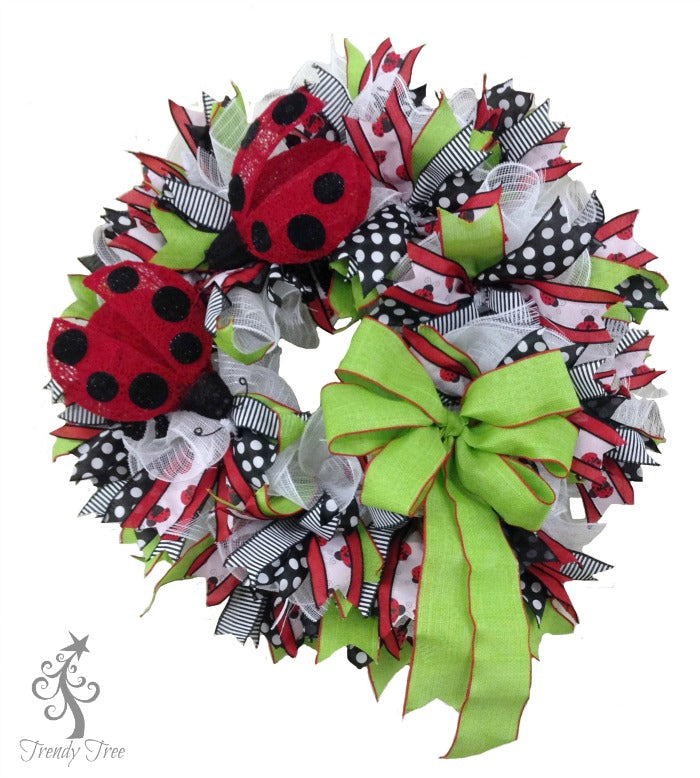
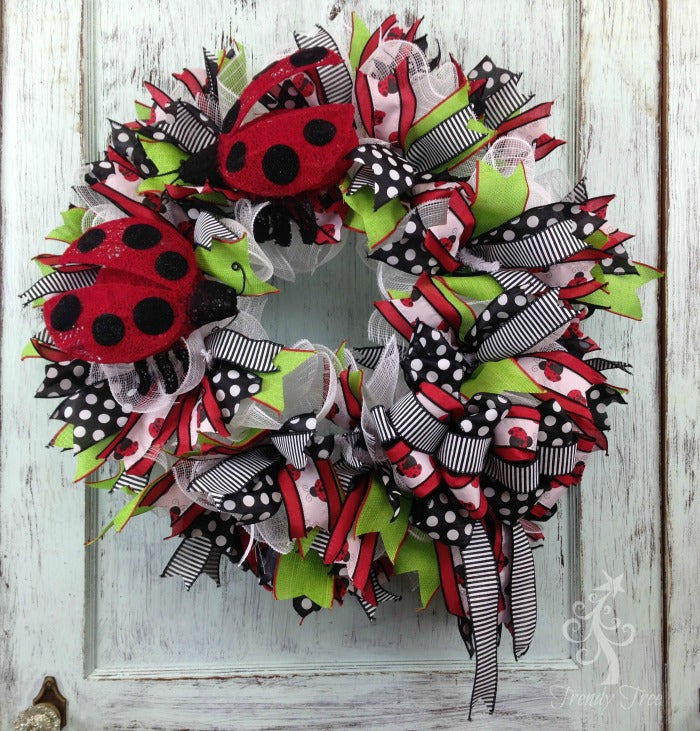
Ready for spring? Here's an adorable wreath to get you started thinking along those lines))) Our weather here in Mississippi for the holidays has been unseasonably warm, so it just felt right to start working on something for spring! Now, in a couple of weeks we could have snow, so you never know.
This 2016 Ladybug Wreath will be available in a limited number of kits. We'll post the individual supplies too. Please note that many times the kits will sell out shortly after the tutorial is posted and the kit will be removed from the website at that time. So if you click on the Wreath Kit link and don't see, this will be because it has sold out and has been removed. We do go ahead and leave the tutorials posted, however, because you can still follow these instructions and create a similar wreath by using other colors of wreaths, mesh, ribbons and adornments.
Ladybug Wreath Supplies
Note: 1/4/16 Sorry but the Ladybug Wreath Kit has sold out and no more kits available at this time.
Other individual products and/or substitutions may be available.
XX750427 White Pencil Wreath 24"
KG2924 Ladybug (2) SOLD OUTRE1301R1 White/White foil Deco Poly Mesh 10" x 10 yards (2)
RG158802 Black/White Polka Dot Ribbon 2.5" x 10 yards
RG8279 Ladybug Ribbon 2.5" x 10 yards
RG178002 Black/White Stripe 1.5" x 10 yards
RG1276W1 Lime/Red 2.5" x 10 yards (sold out)Alternative Suggestions:V119 5" Wool Ladybug - These ladybugs are made of wool and Styrofoam and measure 4" x 5" x 2.5" You could use a cluster of two or three to take the place of the wired ladybug that was used in the tutorial.
We used a white 24" pencil wreath for this project. You can use a 24" work wreath just as well or even different colors. The ruffle technique was chosen because even for the novice, the wreath will turn out uniform in size and it is simple to do.
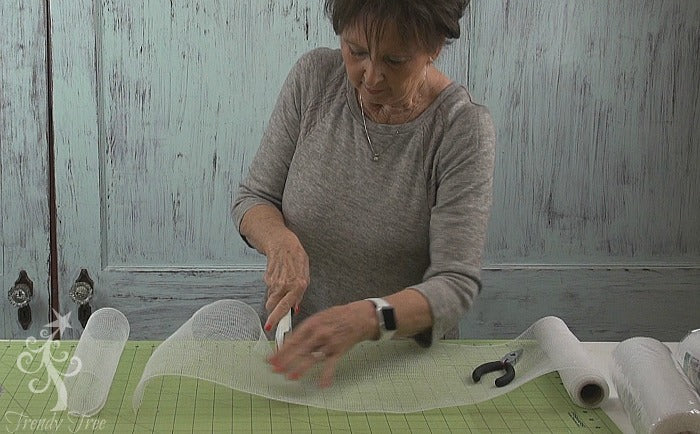
First step was to cut strips of the 10" wide mesh into lengths of 10" We chose a white mesh with white foil (more of a white film and not a metallic foil). To make the ruffle wreaths, it works better to use 10" wide mesh. If you take a 21" wide mesh and split down the middle and then cut your 10" x 10" pieces for ruffles, you will have more raveling. We are asked frequently what can you do to keep mesh from raveling. It all ravels, mesh - poly - jute - paper. The more you handle, the more it ravels and the more cuts in it, the more it ravels. Just know you will have to clip strings when you're done, maybe more than once.
Less expensive, wider weave products ravel more, but in the end, it all ravels.
We use a 24" x 36" self healing Omnigrid Cutting Mat and a 45mm Omnigrid Rotary Cutter (these are available at Amazon and we have included our affiliate links.)
Cut strips 10" in length. It takes almost two rolls to complete this wreath, but you should have a little bit left from the second roll. You can cut two layers at the same time to speed the process up. Using a rotary cutter doesn't change the raveling factor. Typically, you should be able to get 36" pieces from a 10 yard roll. Occasionally, you might only get 34-35 and sometimes you might get 37".
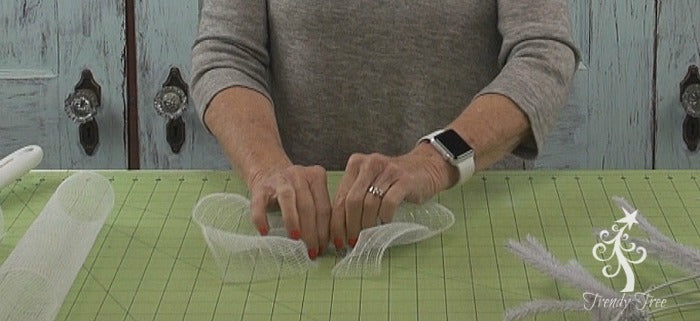
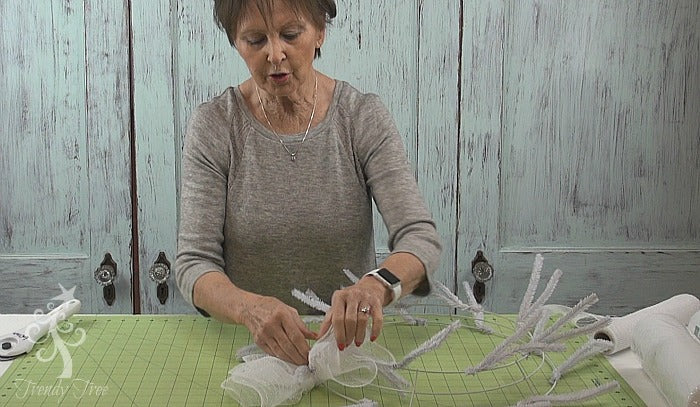
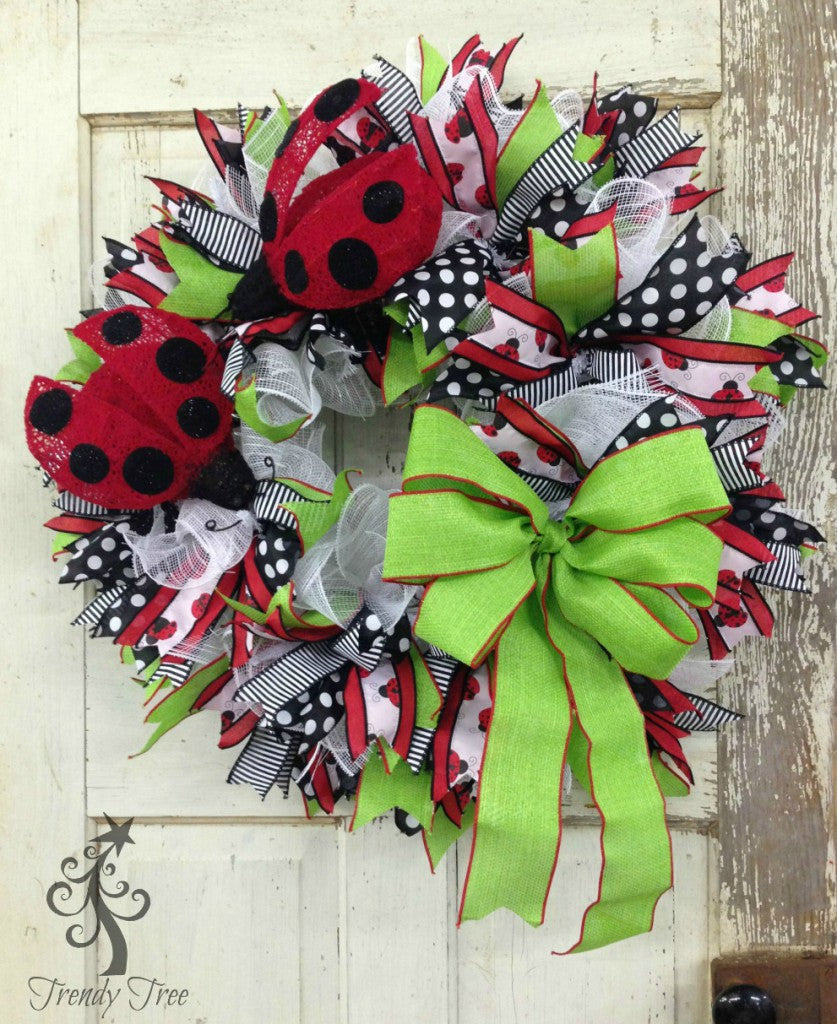
Notice how the poly mesh naturally curls up (roll in left of the image). Lay the mesh flat down with the selvage or uncut edges to the sides, scrunch up through the center of the mesh holding pinched in the center like bow or bow tie.
Make three ruffles and hold them together in your hand, altering the placement so they are not just stacked right on top of each other.
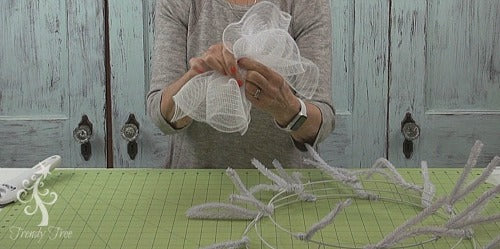
Attached the cluster of three ruffles in one of the twists on the wreath, just giving the twists a couple of turns.
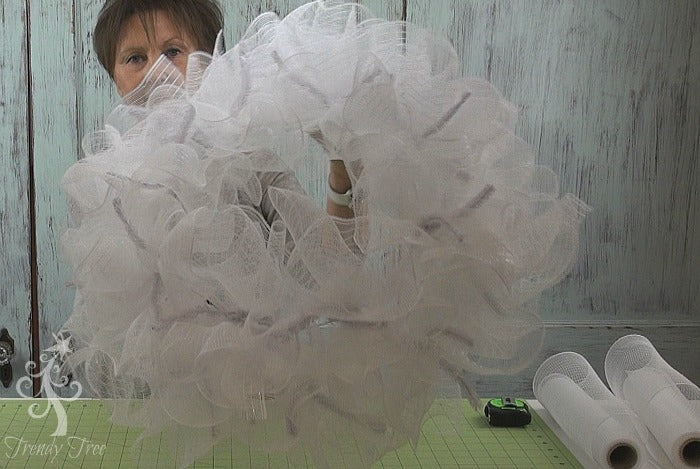
We started on the outer ring of the wreath and continued to place a cluster of three ruffles in each twist. Move to the inner ring and place three ruffles in each twist. If you're working alone it might be easier for you to add a ruffle to each twist and go all the way around your wreath. Just remember, when adding more ruffles be sure to un-do the twist and lay the next ruffle on top, and re-secure the twist.
When the ruffles are completed, you are ready to move to the next step, placing the ribbon strips. A basic white ruffle wreath can be decorated in so many different ways. If you're making this wreath for yourself, you might want to decorate it for Valentine's Day, remove that trip and decorate for spring, etc. When we make wreaths for our tutorials, we try not to permanent affix items to the wreath, so that we can remove and re-decorate. I love re-purposing an old wreath and giving it new life))
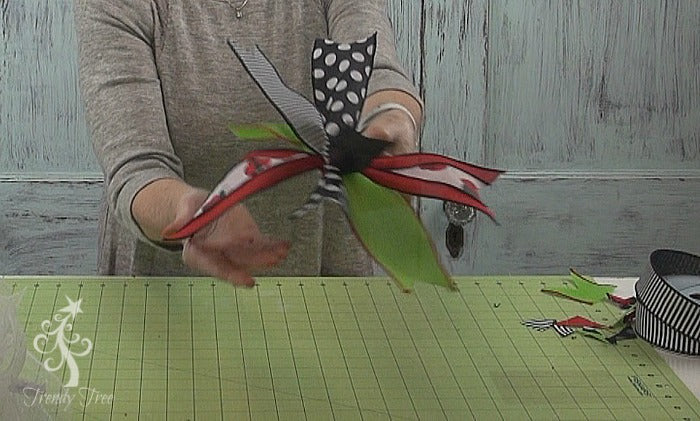
Next step was to cut ribbon strips about 13" in length. Just a tip - it's always good to take a scrap ribbon and do a test size before cutting up your ribbon. Cut a stripe from a left over roll of any kind of ribbon and see what length you need based on how you plan to add your ribbon. Ribbon can be added many different ways. For this wreath, we chose to just take 13" strips, layer the ribbons into a cluster and attach the ribbon cluster all at one time. You can alter this method by using different ribbons or grouping them together in different patterns. Finish off the ends of your ribbons with a chevron (fish mouth) cut or just angle.
Secure the cluster of ribbons by opening a twist (make sure your ruffles stay in place) and lay the ribbon cluster right on top of the last ruffle, re-secure the twist this time using 3-4 twists since this is the last layer of product we will be adding to the twist.
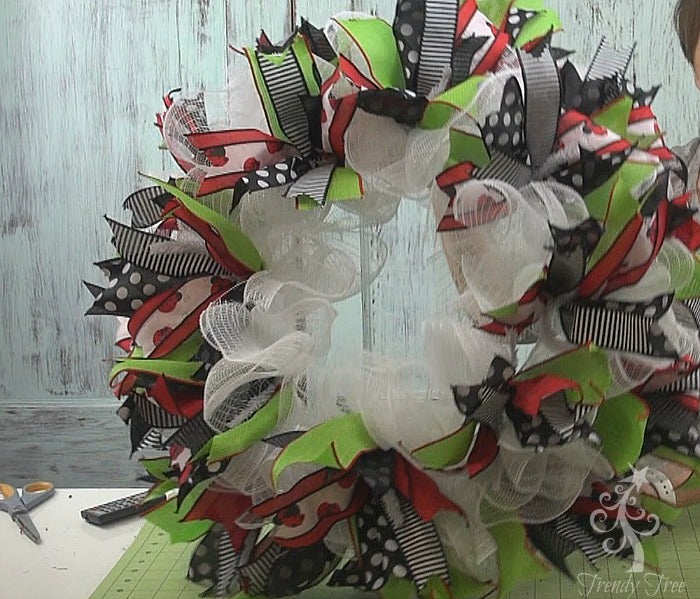
We attached a ribbon cluster into each twist (18 twists around the wreath). Again, ribbons can be placed in a variety of ways. You may want less ribbon to show and more of the white ruffles to show, so just experiment in placing your ribbons until you achieve the look you are going for.
I think the addition of the green gives it a fresh look for spring. You think about lime/red ribbon as just being something for Christmas decorations, but this ribbon doesn't have any metallic on it, so it's great for this wreath with just that little touch of red on the edge.
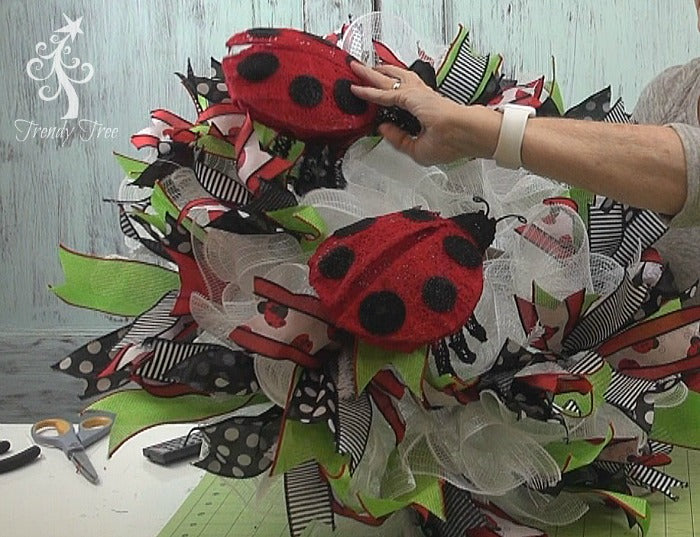
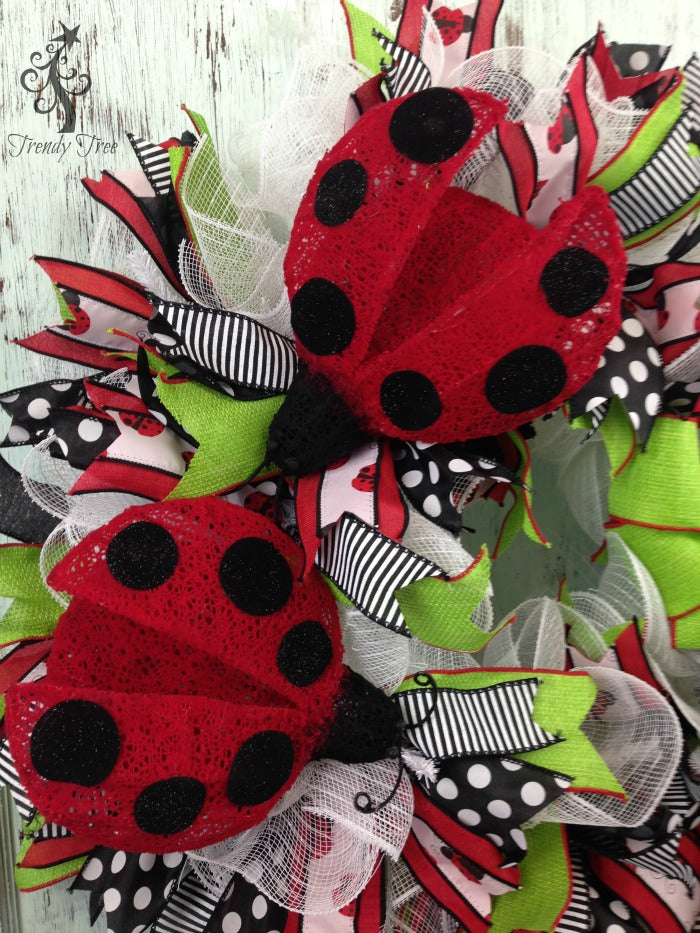
Next, decide on the placement of the ladybugs. They are made of wire mesh and you can fluff the wings out a little bit. We decided on our placement and then secured them to the work wreath frame using chenille stems. You can also use zip ties for a really secure technique.
The final step was adding a bow. You can use a bow or now, just whatever is your preference. On each roll of ribbon we had about 3.5 yards left. We made a simple loop bow using the green ribbon and attached this to the wreath frame with a chenille stem.
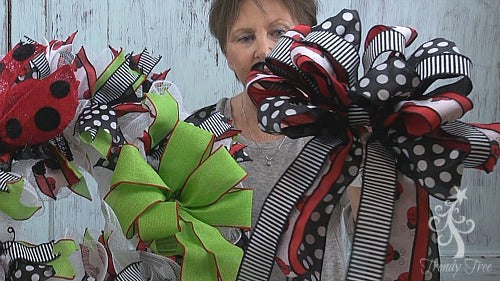
We also took the remaining ribbons and turned them in a whimsical bow using three styles of ribbon. You can use this bow for another project or attach it to the wreath for a change.
The final wreath measured about 27-28" in width and about 9-10" in depth.
The ladybugs are very colorful and make a pretty spring decoration just sitting on a tabletop.
A final step is to clip the strings, flip the wreath to the back and check to make sure you don't have any sharp edges that might scratch your door or wall. Finally, smooth out your ribbon tips.
Save