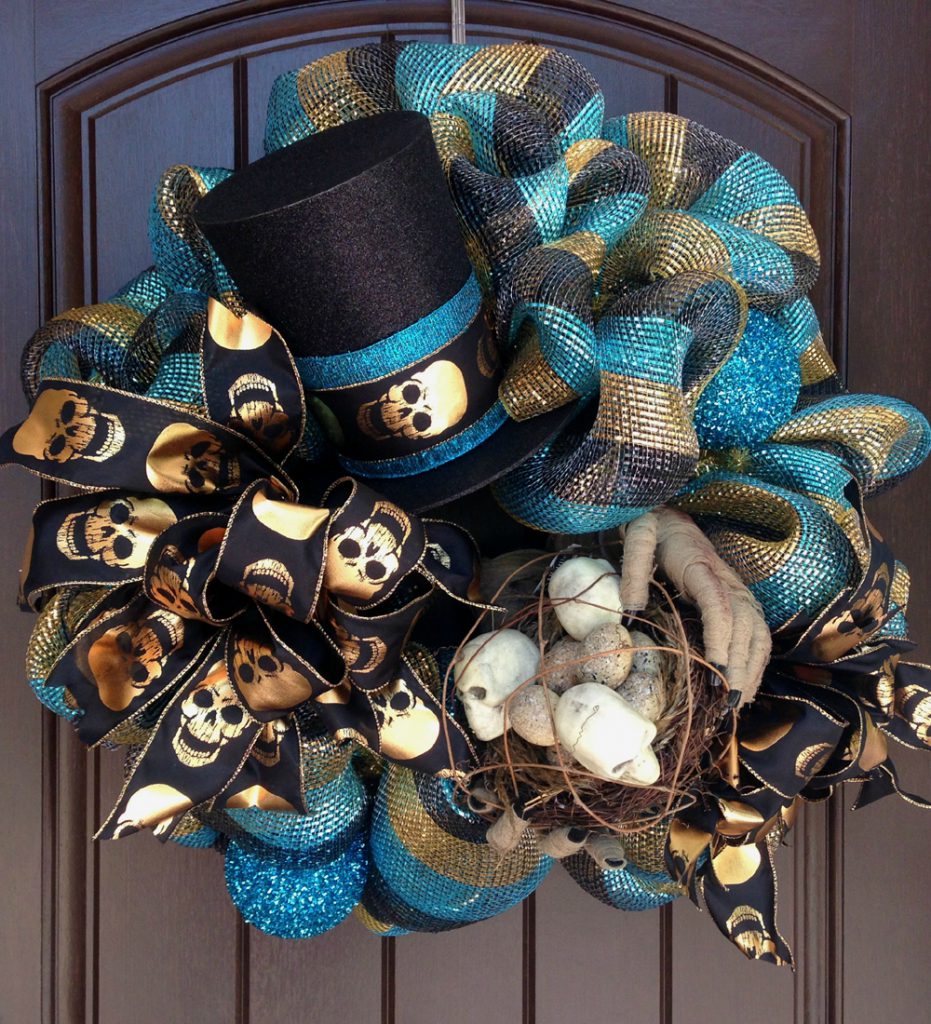
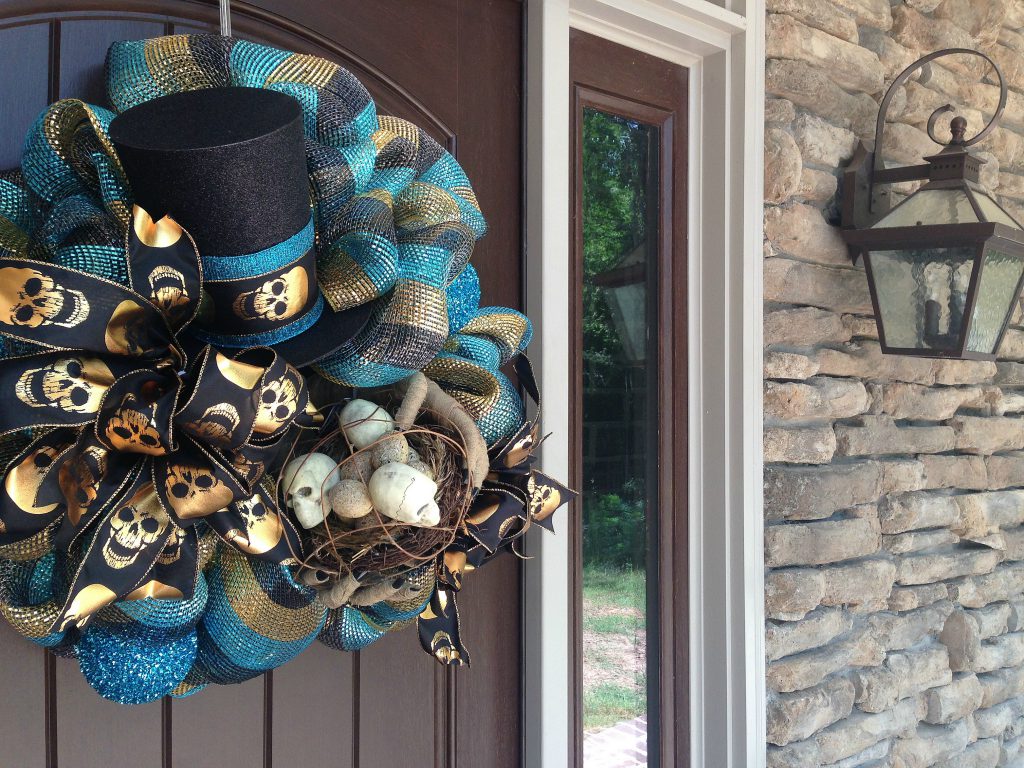
Halloween Wreath with Mummy Hands, Skull Nest & Top Hat
New 2016 Halloween wreath tutorial using a black glitter top hat, skull bird nest and mummy hands.
SuppliesXX751108 24" Gold Pencil Wreath
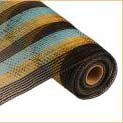
RE1058CC 21" Black Gold Turquoise Stripe Mesh
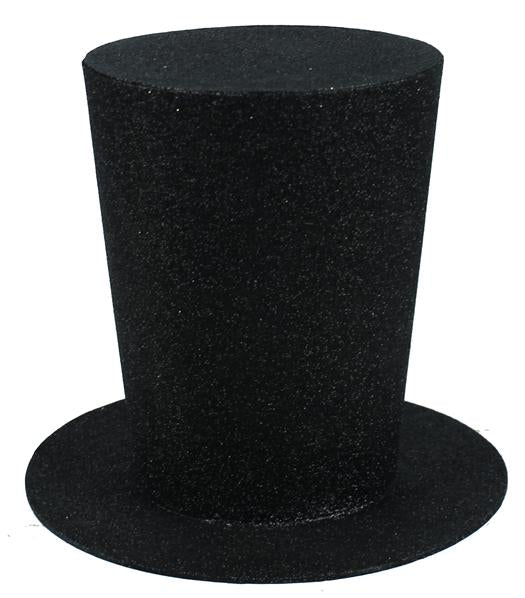
XC9782 9" Black Glitter Top Hat
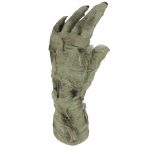
HH7272 Haunted Mummy Hand (2) (Sold out but we do have a Skeleton Hand coming in soon H3609316 by RAZ)
AAF645 Bird Nest with Skulls & Eggs (Sorry, the nest is sold out, no more coming in)
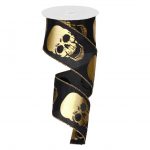
RH00914E 2.5" Black Gold Skeleton Ribbon
RM9768A2 4" Turquoise Metallic Ribbon
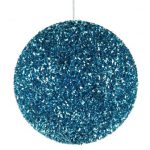
XY652536 4" Cut Foil Turquoise Ball (3) Sold Out but 3" may be available
Please note that this tutorial will be left up even after some or all the supplies we used are sold out since the basic instructions can be followed and other items substituted.
Tutorial Summary
Use the pouf technique to attach 21" mesh to the 24" pencil wreath.
Poufs should measure approximately 14" Attach the mesh to a twist leaving about a 3" tail (this tail can be secured to one of the metal rings with a zip tie to keep it from slipping out)
Measure 14", grasp the mesh and secure in the next twist, giving the twist a couple of turns. We started on the outer ring.
Continue working around the wreath. When you get back to your starting point (where the first pouf was secured, open that twist making sure the first pouf stays in place and secure the last pouf there.
Move up to the inner ring by pulling the mesh snug from the last pouf, secure in the closest twist and continue making your 14" poufs around the center ring. End off the last pouf using the same method as on the outer ring.
Once the last pouf has been secured, cut the mesh from the roll leaving about 4-5" tail. You should have anywhere from 1.5 - 2.5 yards left over. Secure the 4-5" tail to the work wreath frame with another zip tie.
Decorate the cardboard glitter hat by layering the 2.5" gold skeleton ribbon on top of the 4" metallic turquoise ribbon.
You can hot glue these two items together and hot glue to the hat also, or you can just layer the ribbon and tie in a knot on the back.
We attached the hat directly to the outer ring of the work wreath with the ribbon.
If you decide to hot glue the ribbon on to the hat, you will need to punch a hole or two in the hat and secure to the work wreath frame with chenille stems or zip ties.
Attach the mummy hands directly to the work wreath frame using chenille stems or floral wire.Bird nest was positioned in the hands and secured with chenille stems or floral wire to the work wreath frame.
Two large bows were made using individual 30" strips. The bow technique used was based on a funky or whimsical bow technique by Julie at Southern Charm Wreaths. Julie also has a great ebook "Learn Deco Mesh Wreath Design" which is a tremendous help for beginners and experienced wreath makers also)) The bow technique can be found on her Blog.
Three 4" turquoise cut foil balls were attached just using chenille stems and securing to the work wreath frame. They could also be hot glued on if desired.
Thread a chenille stem through the string hanger and just wind the ball around the chenille stem until the chenille stem is snug to the ball. Secure to the frame.
The overall width of the wreath was about 29" or so. Be sure to check the back of your wreath for any sharp edges from zip ties or chenille stems that might scratch your wall. Turn sharp edges to the inside or cover with tape if needed.
You can make a hanger for your wreath using a couple of zip ties.
Hope you enjoyed the tutorial! Click on the icon below to subscribe to our YouTube channel so you won't miss our next tutorial coming out soon))
SaveSaveSaveSaveSaveSaveSaveSaveSaveSaveSaveSave