Send an email to contest@trendytree.com Include your name and shipping address and let us know you liked, watched and shared
Email entry to the address above is the only way to get your name in the hat
Eligibility
You must be 18 or over to enter and you must live within the 48 US Continental States
(Sorry but AI, HI, International, APO, FPO addresses, US territories are excluded from this giveaway.)
This giveaway is not associated with Facebook in any way.
Winner will be determined by random drawing.
Giveaway ends midnight on 4/10/17, no further entries will be accepted after that time.
Winner will be chosen on 4/11/17 and notified by email. Winner's name will also be posted here.
So Get Busy! Watch - Like - Share!
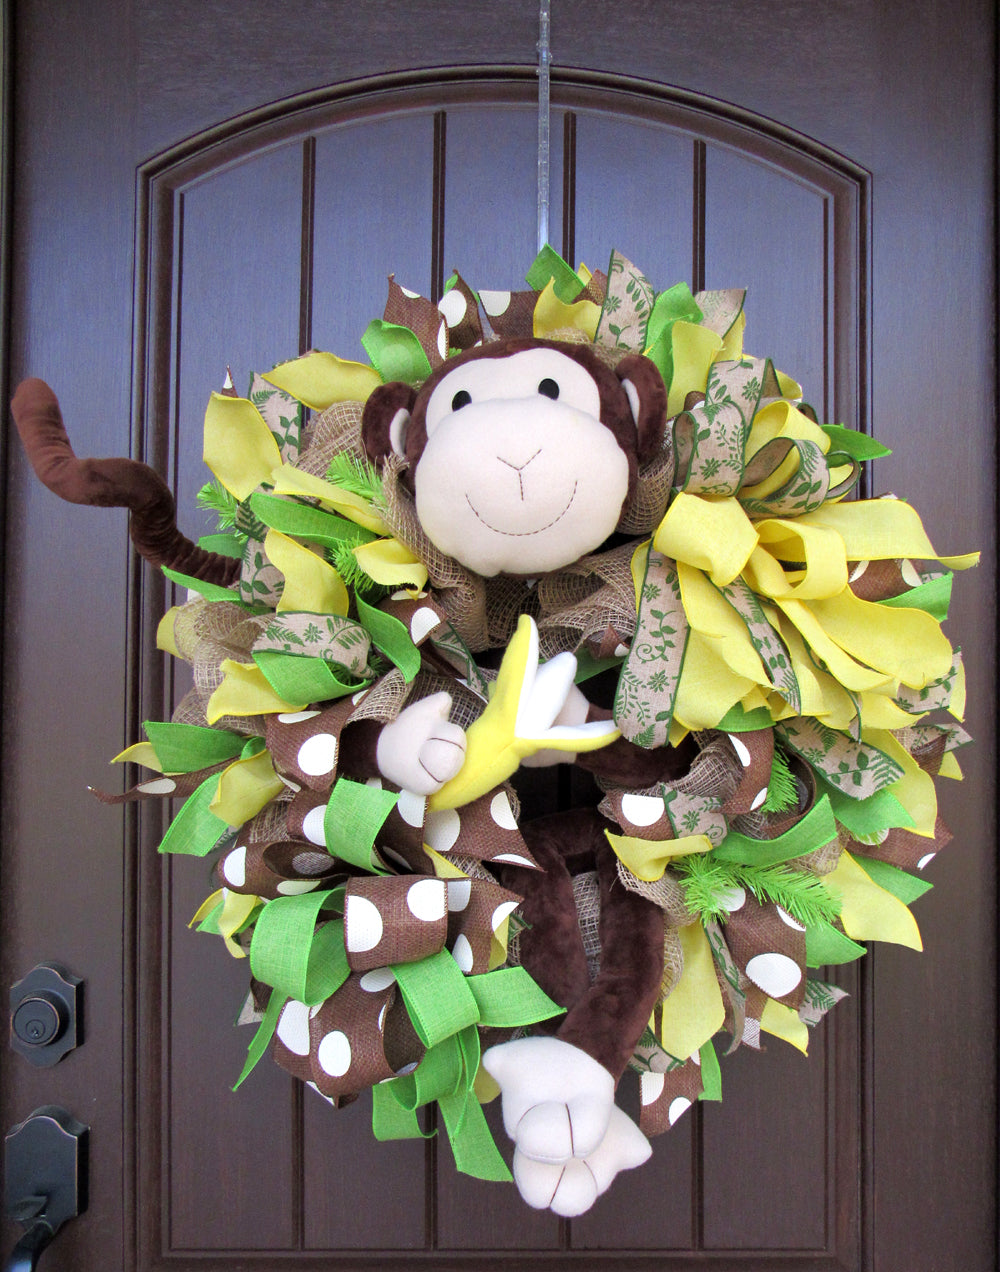
New 2017 Monkey Wreath Tutorial. We did this tutorial using a 5-piece Monkey Wreath Embellishment Kit, on a 24" Work Wreath using the ruffle technique.
Supplies
Ruffles: 10" lengths. Use a cluster of three ruffles in each twist. It's a little easier if you start on the outside ring. Place the ruffles at an angle to each other and don't stack three right on top of each other. Put a cluster of three in each twist on the inner and outer rings of the Work Wreath.
Once the ruffles are placed, the wreath measures about 24" in diameter. It's only necessary to secure the twist with a couple of turns since you will be adding more product later.
Ribbon Strips: There are 18 twists on the 24" Work Wreath so we cut 18 pieces from each ribbon. Strips were cut 13" in length. Always do a test strip before cutting up all your ribbon. You can place your ribbon many different ways, but we gathered up alternating pieces of ribbon by size and pinched them in the center. Hold the four ribbons pinched in the center and spread the out so they are not right on top of each other.
Open up a twist on the Work Wreath, making sure the ruffles stay in place, and lay the ribbon cluster down. Re-secure the twist now with 3-4 turns since this is the last thing being added to the twist. Place a ribbon cluster in each twist. You will have ribbon left over that we will make bows out of later. When cutting your ribbons you can finish the ends with a chevron cut or just an angled cut, whichever you prefer.
Monkey Wreath Embellishment Kit: The monkey comes in five pieces - head, arms, legs and tail. All the pieces have wires to use to attach to the Work Wreath frame and the arm, legs and tail are also wired for shaping. The head has three different wires. Hand the wreath and decide on where you want to place the pieces. Put the pieces in place and work your fingers down through the ruffles or between them when you can, and secure the wires directly to the Work Wreath Frame. You need to use all three wires on the head to secure it well.
Finish: Fluff your ribbons, clip your strings and check the back of your wreath for any sharp edges. The completed wreath measures about 26"
Summary: The ruffle technique is one of the easiest types of wreaths to make, especially for the new wreath maker. It will come out nice and even each time. It takes a little longer since you have to cut the mesh, but it's worth it. We don't recommend splitting 21" mesh to make 10" pieces because the more cuts you have, the more raveling. All mesh products ravel, but this new Fabric Mesh does seem to ravel less. The Polyester in the mesh gives it a great texture and it's a little thicker. All the ribbons were wire edge.
We took the remaining ribbon and made two large bows and placed one to the left side of the monkey head and one in the opposing lower portion of the wreath. The bows were made of only two styles of ribbon. We made the bows at a later time and you can see how we did that by watching the Facebook Live version of the wreath. We'll post it in a day or two at the bottom of this tutorial.
Watch the Facebook Live version of this tutorial that we did 3/31/17. Demonstration of the bow making is at the end of the video.